
Practical meals
Postpartum Meal Prep: What to Make and Freeze Before Birth

Published
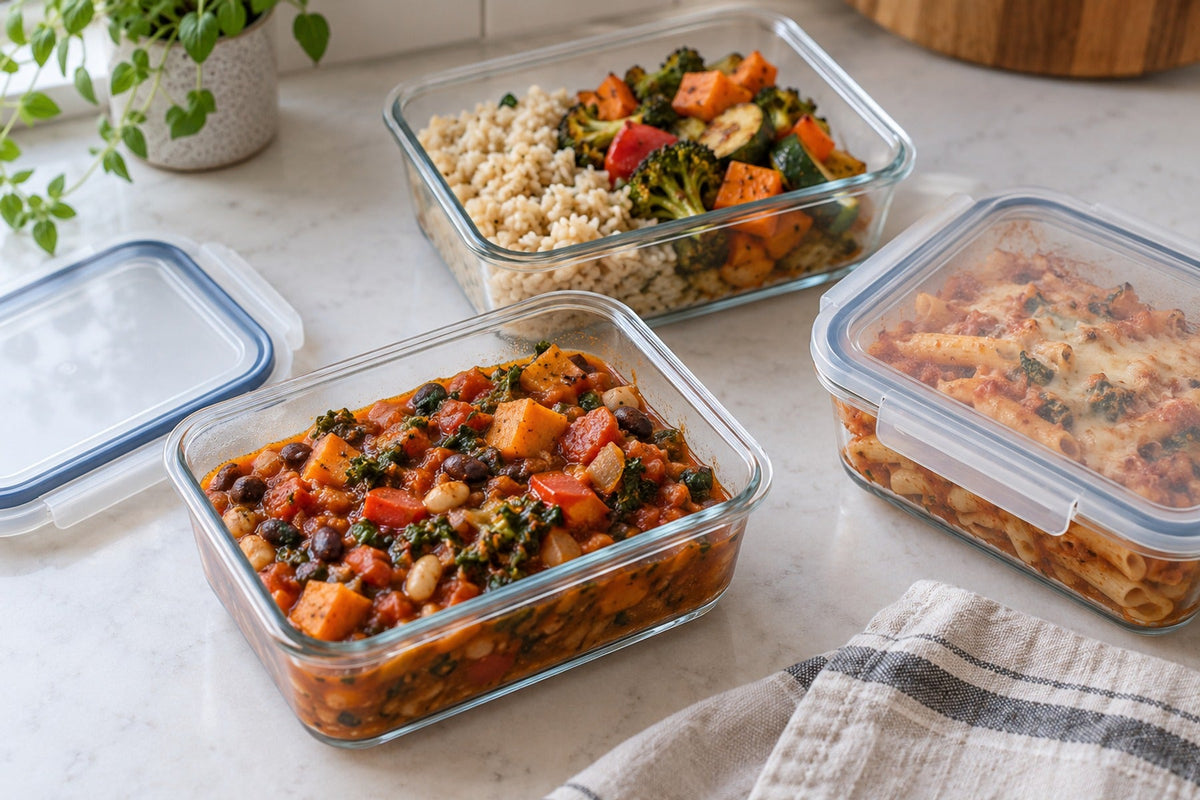
A freezer stocked with ready-to-eat food is one of the best postpartum gifts you can give a friend, loved one, or yourself. Meal prep may seem like a daunting task, but with a little planning, it’s actually a lot easier than it seems. Here are some of the best foods to make and freeze before birth, plus some tips to help you meal prep like a pro.
In this guide
- Be realistic about your meal prep goals
- When should you start postpartum meal prep?
- Five foods worth preparing before birth
- Bring your plan to life
- Make each portion easy for someone else to serve
- How to cool, freeze, and reheat prepared meals
- What if you have very little freezer space?
- Keep it flexible
- Sources
Be realistic about your meal prep goals
It’s easy to get carried away by inspirational videos online, but now isn’t the time to act overly ambitious. Instead, picture the moment you’re preparing for: you’re hungry, the baby needs attention, and dinner needs to require as little thought as possible.
Depending on the size of your family and your eating habits, it may make more sense to freeze individual portions of food rather than large casseroles that require thawing. Or maybe snacks would be the most helpful when your hands are full. Next, think about the space you have in your freezer and how much room you realistically have to use. Lastly, choose foods that you’re familiar with and will actually look forward to eating.
When should you start postpartum meal prep?
Early in your third trimester can be a convenient time to start, but let your energy, available help, freezer space, and expected storage time guide you. If you decide to spend a few hours prepping multiple meals and snacks, consider recruiting help for tasks like grocery shopping and cleanup.
If you want to keep things a little more flexible (and avoid standing in the kitchen for hours closer to your due date), start by adding an extra portion whenever you make a meal you like, and freeze the leftovers. This jumpstarts your stockpile with a variety of foods without needing to spend a long day in the kitchen.
To better target the best time to prep your meals, refer to the freezer-storage guidance below and work backward from when you expect to eat the food.
Five foods worth preparing before birth
As mentioned before, it’s best to use familiar recipes you already enjoy. This simplifies the prep process and avoids waste if a food doesn’t turn out. Next, dial in your plan by thinking about what you’ll serve alongside each dish.
If you need some inspo, here are five easy-to-prep foods that reheat well and make it easy to get the nutrition you need postpartum. The linked recipes can help you get started. Note whether a dish should be frozen before or after baking, and use the cooling, storage, and reheating guidance below for cooked portions—even when a recipe gives only a time estimate.
1. Soup, stew or chili
Soups and stews are easy to prep and reheat, and you can easily pack them with nutrition or customize recipes to your needs. Even better, you can use them multiple ways. For example, a tomato-based bean chili might go with rice one day and over a potato another. Beef stew can be eaten as a soup with bread, or over egg noodles.
When you store foods like soup, leave room in freezer-safe containers for expansion. Keep a supply of the accompaniments too: the soup is more useful when there’s bread in the freezer or rice in the cupboard.
2. A sauce that works with several meals
Sauce is a great example of how a little time in the kitchen can go a long way. Lentil or meat tomato sauce is easy to pair with pasta, a potato, or cooked grains. Freezing the sauce separately allows a lot of flexibility, so you can eat what sounds good, versus deciding solely based on what you have.
You can also add extra nutrition into your sauce. For example, blend white beans into tomato-based sauce for extra fiber and protein. Or, blend butternut squash or carrots into cheese sauce to pack in more vitamins and minerals.
Portion your sauce for the way you’ll use it. One lunch portion avoids thawing a large batch when you’re eating alone, whereas a larger container may suit a household dinner.
3. Components for a bowl or plate
Frozen staples like cooked grains and meat, alongside canned or frozen veggies, make it super simple to build a variety of meals whenever you need them. Add beans, salsa, and lettuce to reheated frozen rice and ground beef or tofu for a burrito bowl. Or, stock cooked teriyaki chicken and white rice in the freezer to easily pair with steamed broccoli.
The key is to freeze a few components like meat, grains, and beans in useful portions, then add vegetables and a sauce when you’re ready to eat. This works for pantry components too. Canned beans, quick-cooking pasta, and a favorite dressing can do a lot of the work without taking up freezer space.
4. A baked dish for household dinners
You’ll thank yourself later for prepping a few casseroles, especially if you have a larger family. Warm, cozy dishes like spinach lasagna and chicken pot pie really hit the spot in those early, sleep-deprived days.
It’s best to choose a recipe formulated for freezing to make sure it reheats well. You can also divide the recipe into smaller dishes if you don’t want a whole tray at once. Follow the directions for the recipe you choose, label the reheating instructions before you freeze, and enjoy!
5. Breakfasts you can portion
Don’t forget about breakfast! Avoid any stress or a dirty kitchen first thing with premade, frozen breakfast sandwiches, waffles, or an egg-and-veggie bake. Divide any casserole-type dishes into individual portions before freezing so you can reheat as much as you want.
Like the bowl strategy, keep components like yogurt, smoothie packs, and granola on hand for a quick, buildable breakfast.
Bring your plan to life
Now let’s see how far a little prep can really go. Here’s an example of how you can turn three things you cook into six future meals:
- Freeze two lunch portions of bean chili. Later, serve one with bread and the other over a baked or microwaved potato.
- Freeze two lunch portions of lentil or meat tomato sauce. Use one with pasta and the other in a bowl of cooked grains and vegetables.
- Freeze two portions of cooked rice and beans. Make one into a bowl with salsa and avocado, and tuck the other into a warm tortilla with cheese or a spread you enjoy.
When it’s time to grocery shop, just add the accompaniments you need to your list, like bread, potatoes, or vegetables. Don’t forget to grab any toppings you love!
Make each portion easy for someone else to serve
A clear label means anyone can help you finish lunch, and eliminates the risk of you forgetting how to reheat everything you worked so hard to prepare. Include the food name, preparation date, portion information, and thawing or reheating directions. Add allergens if someone else needs to know them.
For example: “Lentil tomato sauce · one lunch portion · prepared [date] · thaw in fridge; reheat to 165°F · serve with pasta.”
It also helps to keep a short inventory on the freezer door or in a shared note. Cross off portions as they’re used, and keep the foods you’ll want soonest front and center so they’re easiest to find.
How to cool, freeze, and reheat prepared meals
These steps help protect the food’s texture and quality and reduce the risk of foodborne illness. USDA’s leftovers guidance covers the essential steps to follow while you prepare the food to safely store it and make using it later much simpler.
Cool food promptly
Refrigerate perishable food within two hours of cooking or taking it off the heat; shorten that limit to one hour if the surrounding temperature is above 90°F. Divide large batches into shallow containers so they cool quickly. Hot food can go straight into the refrigerator—don’t wait for a pot to reach room temperature on the counter. Discard food left out longer than those limits.
Keep your refrigerator at 40°F or below and freezer at 0°F or below; an appliance thermometer helps you check.
Freeze what you won’t use soon
Use refrigerated cooked leftovers within three to four days. Freeze the portions you won’t eat in that window.
Food that was handled safely before freezing and stays continuously frozen at 0°F or below can remain safe indefinitely. Freezing won’t make mishandled food safe, though, and flavor and texture can change over time. For best quality, FoodSafety.gov recommends two to three months for soups, stews, and baked egg casseroles. Other foods have different quality windows, so check the storage chart below and work backward from when you expect to use each dish.
Thaw in the fridge or use a safe reheating method
Thawing in the refrigerator can make larger dishes easier to heat evenly. Move a casserole to the fridge ahead of time, allowing enough time for its size. Avoid thawing on the kitchen counter. If you use the microwave to thaw cooked leftovers, continue heating right away until they reach 165°F throughout.
If you forget to thaw dinner, no worries! Soup, stew, and sauces can go straight from frozen to a saucepan or the microwave. Just allow extra heating time and stir consistently to ensure even heating.
Reheat cooked leftovers to 165°F throughout, using a food thermometer to check. Bring soups and sauces to a rolling boil. In the microwave, cover with a microwave-safe lid or wrap, leave a vent for steam, and stir or rotate during heating. Allow a brief standing time, then check several places with the thermometer; a hot edge can hide a cold center.
What if you have very little freezer space?
If you’re working with a small amount of freezer space, lean more into small frozen portions and remember your pantry is a great place to store quick prep foods like pasta, canned goods, nuts, and nut butters.
Also keep in mind that a grocery delivery or a prepared meal can fill a gap just as well as something you made yourself. There’s no shame in cutting corners or delegating help as you adjust and bond with your little one.
Keep it flexible
Meal prep is all about convenience, but it’s most important to make sure you actually want the food you’re making. Having a variety of soups, sauces, and meal components on hand allows you to be flexible with different flavors and serving sizes. As a result, you’re less likely to waste the food you prepare.
Now all that’s left to do is get started! Think about the meal that will help most, and add the ingredients you need to this week’s grocery list. Make an extra portion or two, label, and freeze. Repeat this process for a few weeks, and you’ll be well on your way to building a delicious stockpile of meals for when baby arrives.
Sources
Keep reading

Practical meals
Easy postpartum meals for days when cooking isn't happening
Published
Eight low-prep meals, flexible grocery shortcuts and simple ways to keep yourself fed when cooking feels like too much.
Read the guide: Easy postpartum meals for days when cooking isn't happening
Practical meals
10 practical postpartum snacks for low-prep days

Published
Ten practical postpartum snacks, with cupboard and fridge options, simple combinations, and food-storage guidance.
Read the guide: 10 practical postpartum snacks for low-prep days